1. Solid Covers only – remove water from top of cover with a pump or syphon. Starting at one end of pool, with 2 people on either side, roll cover towards other end of pool. Try to get as little dirt and debris from top of cover. Clean cover and store away (ask about Stowaway chemical for storing). Treat water tubes the same way.
2. Loop-loc covers – Starting at the deep end of pool, unhook the springs. Then start up the sides unhooking springs on both sides and folding cover as you go, until cover is completely removed.
Lay cover out, rinse off, let dry, fold and store in original bag. Loop loc covers can also be stored in a Stowaway solution if preferred.
3. If water level is below normal level of 1/2 way on the skimmer, add water to fill to that line. If water level is above 1/2 way on the skimmer lower the level by connecting your vacuum (after steps 4,5,6, 7) and with your filter valve turned to waste, vacuuming the pool debris to waste until the water level reaches the correct fill line.
4. Remove winter plugs from returns and steps. Screw directional flow fittings back into returns in pool (note – step jet returns only get the trim. ring, not the center eyeball). Directional eyeballs should be turned in the same direction (left or right) pointing away from the skimmer and slightly downward to create a circular flow of water around the entire pool toward the skimmer. Put baskets back in skimmer and pump. Put drain plugs back in pump (1on round lid pum.ps, 2 on square lid pumps). Put drain cap back on bottom of filter.
5. If needed, this will be the easiest time to replace your sand in the filter, as it is dry (every 3 years on Baq. or SS and every 5 years if you are using chlorine). If not replacing sand, open top of filter and remove any excess debris within the top 1″ of sand, either by hand or with a small shop vac.
6. If using a D.E. filter, unscrew top of filter .and do a chemical filter clean for 24 hours before starting up pool (skip this step if filter was cleaned after pool was closed in fall). Examine plates that fingers hang from (top & bottom) for any stress hairline cracks. Replace if any are found. Clean off gasket and tank area before reassembling.
7. Reconnect all lines at filter using Teflon tape or clear silicone on threaded ends. Make sure any gaskets or O-rings on fittings are clean, and not cracked, broken, stretched or pinched (do not use Vaseline on gaskets and O-rings). If using an automatic chlorinator, reconnect in the same manner, and fill With LARGE tablets or sticks that are recommended for such chlorinators.
8. Set all return ball or gate valves to the OPEN position. (If water level is not yet up and you have a bottom drain, set valves to FULL or OPEN drain valve and close skimmer valve). Put one bucket of water in top of pump. Check gasket under pump lid to make sure it is properly seated and clean from sand or debris. Close lid and seal tightly. Turn on filter. (D.E.FIL ERS only – within a few minutes of the system purging itself of all air, add the proper amount of Earth for your filter through the skimmer – do not vacuum before adding Earth.)
TROUBLESHOOTING: If after running the filter for approximately 5 minutes, all air is not purged from the system (water level should be full in pump-basket), stop the system and go over what you have connected to make sure there are no leaks, gaskets missing or pinched and everything is properly sealed. DO NOT attempt to vacuum until water is at proper level and all air is-out of the system.
9. “When system is running properly check your pressure gauge reading. It may be different than last year. When the pressure rises 15 lbs. above that number, backwash your sand filter or bump the Earth filter 7 or 8 times. If pressure gauge does not move at all, replace the gauge. Do not operate the filter for an extended period of time without a gauge.
10. Clean ladders and handrails and reinstall in pool. Make sure rubber ladder bumpers are in good condition. and properly fitted. If not, replace them.
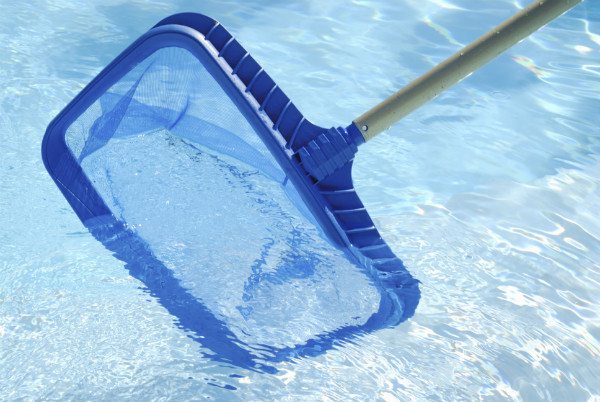
11. Vacuum pool BEFORE adding start up chemicals. (TROUBLESHOOT ING) If vacuum does not have suction or is picking up debris too slowly, make sure to check the following: A. Is water at proper level in pool? B. Is vacuum head connected to the proper end of the hose? (Swivel cuff should be on vac head, not skim vac.) C. Is the black gasket on the skim vac in good condition? D. Is there a hole or cut in the hose? Remember; you will not get good suction for vacuuming, if the filter system has an air leak. On the same note, if when the vacuum is not hooked up to the filter and the system is working properly, then the problem HAS to be with your vacuum equipment or water level. One last thing to remember here is that you should always backwash a sand filter or bump an earth filter prior to starting vacuuming, and you may have to repeat during vacuuming if there is a lot of dirt or debris being picked up. Also remember to backwash or bump again when finished. (Earth filters may need to have a change of Earth at this time also
12. ADDING CHEMICALS:
CHLORINE: If you have had water tested in prior years, and know you have a problem with metals, add a Metal out as your first step. Run filter for at least 4 hours prior to adding the other chemicals.
A. With your test kit, check the reading for PH, and add up or down to bring into proper range. Run filter 4 hours before proceeding.
B. Add 1quart of a 60 % algaecide to pool water and circulate for 1hour.
C. Add the proper amount of start up shock to the pool water and at the same time, add whatever type of maintenance chlorine you are using (exception – if using granular, wait 4 hours to add)
D. Retest pool after 24 hours and adjust maintenance doses or chlorinator setting accordingly.
E. Take a water sample to your pool store for analysis of your calcium and alkalinity and metal ranges.
SOFTSWIM OR BAQUACIL: Add Stain control or Baq Out prior to adding any other chemicals and run filter at least 4 hours.
A. Add the monthly required amount of Shock, and 1quart of “A” (Baquacil users, add weekly dose of Baqua Check 50 in place of A) directly to pool water. Run filter 8 hours.
B. Test Softswim “B” (or Baquacil) level and add the proper amount to bring pool into the 50 range. Do not cut this amount in half for the opening procedure.
C. Take water sample to pool store or analysis of your calcium and alkalinity and PH and metal ranges.
OPTIMIZER: If you used this product last year, you need to be tested by your pool-store, for top up dose at beginning of season.
POOL LIGHT: There is only one screw that holds the light in, but it is tricky to get in. Be careful not to strip the threads. If you do, you will need to purchase a light wedge to repair the problem • Remember, not to turn light on until it is back in the pool, as they are water cooled.
HEATERS: Make sure all the petcocks on the unit are closed, and the pilot light is lit. If pilot light does not light, check to see that the nozzle is-clear. Make sure all valv